NME TLC

The latest version of NME adds a new feature to the tool, “Three Letter Compiler” (TLC). This feature is designed to get you going quickly on a new or existing project.

First, make sure you have the latest NME installed. If are going to do some cpp compiling from windows, it is best to install the latest version of Microsoft Visual Studio (“Desktop” version). Now while you are waiting for that to download, you can have some fun with NME.

The haxe ‘haxelib’ utility allows you to run library scripts using the ‘run’ command, like:
haxelib run nme
NME has various features ‘commands’ that you can use, the first one is ‘help’, which prints a list of possible commands:
haxelib run nme help

The first thing you will notice that it is going to get pretty tedious typing “haxelib run nme …” every time you want to do something, so the best thing to do is to setup an alias. If you have your own admin style, you may choose to do this anyway you like (like the unix ‘alias’ command), but you can also achieve this using:
haxelib run nme setup
which will create a small shell script or batch file to save you some time. So now we can use the “nme” command instead of haxelib.

Now we have done some basic setup, it’s time to check out the demos. To see the list of installed demos, use the command:
nme demo
This should give you a list of 20-something demos to try. Listed on the left is the abbreviation you can use – just pass this command to the nme demo command (eg, ‘he’ is short for ‘HerokuShaders’). When you run a demo, the binary files will be created inside your current directory, so before we start, it is best to move to a ‘scratch’ area that we can delete later.

cd c:\temp
mkdir scratch
cd scratch

Has your compiler finished downloading yet? Maybe not, we will try it first with neko.

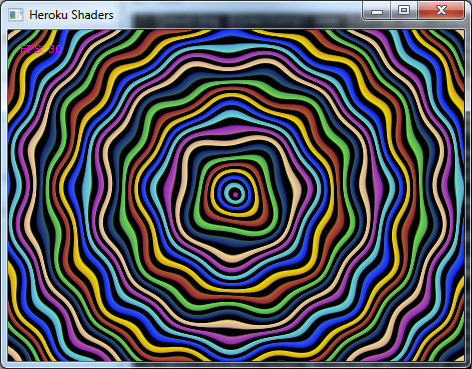
nme demo hero neko

HerokuShaders

This should get you up and running. You can explore the other demos like this. You will notice the last parameter, ‘neko’. This is the target – if you were not to specify anything here, nme would assume the default target, which is a ‘cpp’ compile. You can set the default target using the nme ‘set’ command:
nme set target neko
Now code will be compiled by default for neko. You can remove the set value with the ‘unset’ command. For advanced users, you can use the command:

nme set bin c:/temp/scratch

To set the output (binary) directory for all your nme projects. This will allow you to keep the generated output files outside your source file tree, separating the disposable files from the precious. You can also do this when compiling any project by using the ‘-bin path/to/output’ command line options. Don’t forget to “nme unset bin” to restore normal behaviour.

If you are every wondering what is going on under the hood, and where the files are actually going, you can use the ‘-v’ verbose flag to get nme to dump out a bunch of stuff as it goes. You can also set this on for always, using:

nme set verbose

Ok, the demos are working, but you want to get your own code going, and it is time to fire up the text editor. The main nme drawing APIs are based in the flash drawing APis. The easiest way to get started is to create a “DisplayObject” and draw something into it. If this is you “main” class, then NME will take care of getting your object onto the screen. The best place to start is in a empty directory with a “Sprite” class. So we can start with some code like this (in “MyGame.hx” – the name must match the class name):

class MyGame extends nme.display.Sprite
{
   public function new()
   {
      super();
      graphics.beginFill(0x00ff00);
      graphics.drawCircle(100,100,100);
   }
}


Now, in the directory you can issue the command:

nme

With a little TLC, you can get your first game going (not very exciting mind you). When run on its own, the nme command will use the default target (which we have set to neko), it will run the default command (which is ‘test’, unless you use the ‘set’ command to say otherwise) and it will look for the best project file. If there is no project file, then it will look for a single “.hx” file. If the command gets confused by multiple files, it will simply just not work. You can also use this command in the demo directories since they have either a single project or single haxe file. Indeed, you can compile most projects like this.

There are also a few things you can do with source code using special comments to change some of the programs attributes. At some point it is worth switching over to a proper project file, but until then you can have some fun with ‘// nme:’:

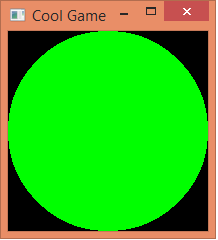
CoolGame

// nme: background=0x000000
// nme: width=200
// nme: height=200
// nme: title=Cool Game

class MyGame extends nme.display.Sprite
{
   public function new()
   {
      super();
      graphics.beginFill(0x00ff00);
      graphics.drawCircle(100,100,100);
   }
}

Cool game indeed.

Nme also allows you to compile demos from some other projects. Just add the project name after the ‘demo’ command. Openfl is closely related to NME, so they are quite compatible. Firstly, install the openfl demos, using

PiratePig


haxelib install openfl-samples

Now you can get a list with:

nme demo openfl

And then run one with:

nme demo openfl pirate

Since HaxeFlixel uses openfl, it too shares compatibility with NME. However, you currently must be running the a version newer than 3.2.2 to get it to work. First install the flixel samples with:

haxelib install flixel-demos

Then get the development version by by cloning the repo from GitHub and using haxelib to point at this new download. This in turn needs the git version of flixel-addons, so updating requires:

haxelib git flixel https://github.com/HaxeFlixel/flixel.git
haxelib git flixel-addons https://github.com/HaxeFlixel/flixel-addons.git
nme demo flixel

Will show the list. We can now try the classic bunnymark, but this time will will make sure we compile it for ‘cpp’ for maximum speed. (Has your download has finished yet?). Arrr!

nme demo flixel flxbunny cpp

BunnyMark

HaxeUi

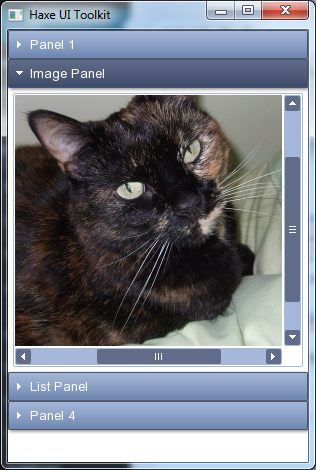
Another project you can try is the “haxeui” project. With:

haxelib install haxeui
nme demo haxeui
nme demo haxeui accord

Hopefully the NME TLC can help your workflow a bit.

NME 5.0 (re)Released!

It has been a little while coming, but I have released a new version of NME, v5.0, available on haxelib today (“haxelib install nme”). If you wish to do some development rebuilding the nme binaries, you can also download the companion project, nme-state, which provides the libraries required for developing NME.

The source code can be found on the official NME github repo. Bleeding edge/nightly builds can be found at the dedicated build site nmehost.com, and the discussion forum is the google NME host group.

NME is not Openfl. The NME and Openfl code bases forked towards the end of 2013 when new haxe code was placed in openfl-native. Later the run-tool, binaries and templates were also placed in separate projects. Today, NME is a lot closer to the lime project, which has the same native code DNA, but only has a subset of the haxe files. NME has also changed its remit to lessen its ties to the flash API, with “inspired by the flash API” probably being the closest description.

My main reason for resuming the NME project is focus. I have dropped support for all targets other than windows, mac, linux, iOS, android (x86 support has been added) and flash. I have also dropped support for opengles1 (fixed function) rendering, and everything is done with shaders now. There is currently no HTML target – this may change in the future – but also maybe not. Other binary platforms may be supported if there is significant and lasting support in the market. It has only been by reducing the scope of the project that I have managed to make forward progress, so I’m keen to keep this focus.

There are other reasons why a single, compact project is more appealing to me than several inter-dependent projects. That is, where the templates, binaries, haxe code and run tool are all 100% synchronized and edited as a whole. This coherence has made the additions of some new features much easier:

  • Android view. Instead of generating a full apk, NME can generate a self-contained fragment (jar, binary, java), which can be included in a larger project, which might contain native controls etc.
  • iOS view. NME can generate a library+header file that implements the UIViewController interface, which can then be linked into bigger iPhone applications.
  • StageVideo. The two mobile projects can use the new StageVideo API to play or stream videos, while using haxe for rendering controls or other graphics over the top.
  • Static linking. NME have moved to SDL2, which now has much more developer friendly licensing terms, so NME is now GPL free! This means that programs can be statically linked into a single exe with no external dependencies (if you so desire).

Some features have been disabled. Most notably, the extension system has been removed and not yet replaced. I’m hoping to implement a more simplified or integrated solution based on the static linking principles. Android audio has also been reverted to the Java based API while I’m hoping an opensl solution may be possible. Asset libraries have also been removed, to be replaced by using haxe code where appropriate.

There have been quite a few minor fixes to the code base, including:

  • Preemptive GC. This experimental feature can be enabled from the Stage and allows the garbage collection to happen in parallel with the render. Since the render uses native code (except for ‘direct renders’), the GC should be able to proceed with reduced impact on the frame rate.
  • Shader-based line anti-aliasing. This allows smooth edges on hardware accelerated lines without multi-sampling AA.
  • Vertex Buffers. Internally, hardware geometry is stored in vertex buffers, which should improve rendering performance.
  • Premultiplied alpha. Some initial support for premultiplied alpha (bitmap property) has been added to avoid halos on objects where alpha transitions to 0. There is still some work to be done on this feature.
  • JNI fixes. Improved android interaction with JNI and timing code
  • Integration with ‘waxe’ project. NME is forming a closer relationship with the waxe (wxWidgets native widget set) project.
  • Refactored run script. This is still a work-in-progress, with some features removed, but some features have been added – like three-letter-compiling (“nme”), and building without the need for a project file (for simple programs).

These changes are generally in the native code, which is similar to the code in the lime project. So it should be possible to port features from one project to the other.

I have also implemented an automated build system. This should mean more consistent and frequent releases – including nightly builds for the more experimental people, and makes supporting both static and dynamic linking easier. NME uses the companion developer project “nme-state” for rarely changing libraries. This project uses neko and the hxcpp compiler toolchain files to ensure that all builds have consistent compiler flags and all sub-targets are supported where required, while not requiring additional dependencies. Having automated builds also makes upgrading easier, such as upgrading libcurl to not block in ssl calls.

NME aims to be largely compatible with Openfl, so that developers can switch between the two implementations if required. There will be ongoing support for this.

So NME has gone through a few changes. Some things have been improved, some things may be still be in transition, and some things may be dropped. If you rely on one of the dropped features, I suggest you stick with Openfl. If you prefer this project structure, come and join the team.

HXCPP Built-in Debugging

The latest version of hxcpp has increased control over how much debugging information is included in the compiled code, as well as some built-in debugging and profiling tools.

Debugging is normally added with the -debug flag to the compiler. This flag turns off compiler optimisation, adds source-line and call-stack tracking and adds additional runtime checks – eg for null pointer access. This is useful for locating problems, but it can make the code run several times slower.

Depending on the application, you may not need all these debugging features. For example, if you do not intend to attach a native debugger, then you probably do not need to turn off compiler optimisations. If you are trying to profile the code, you probably only want the call-stack symbols, but not the other runtime checks. These scenarios are now supported by HXCPP, via compiler defines.

Quick recap: To add a define to the haxe compiler, you can use the “-D DEFINE” syntax on the command line or hxml file, or <haxedef name="DEFINE" /> from an nmml file.

Now, for testing performance, I will be using BunnyMark, and add bunnies until there the a measurable drop in performance. In this case, I added 20000 bunnies to get a frame-rate of about 50fps on my macbook air.

Adding the -debug flag brings the frame-rate down to about 40fps. This is not a huge drop – I guess because the CPU is not that taxed, it the the GPU that is doing more work.

So instead of adding the -debug flag, we can add various defines to achieve the effect we are after.

HXCPP_DEBUG_LINK

Adding this define will keep the symbol tables in the final executable. This is probably not something you want to do in your final release build for external use, but it is something that that is good to have otherwise. This flag will allow you to get meaningful information if you attach your system debugger. Runtime performance hit: none.

DHXCPP_STACK_TRACE

This define will allow you to get a haxe stack trace that includes function names when an exception is thrown, or when the stack is queried directly. There is a small overhead incurred per function call when this is on. Runtime performance hit: very small.

HXCPP_STACK_LINE

This define implies DHXCPP_STACK_TRACE and adds line numbers to the function names. There is additional overhead per line of haxe code, however I had trouble measuring this overhead on the bunnymark – probably because it is not too CPU intensive. Runtime performance hit: small to medium.

HXCPP_CHECK_POINTER

This define explicitly checks pointers for null access and throws an informative exception, rather than just crashing. There is an overhead per member-access. Again, for the bunnymark, it was hard to measure a slowdown. Runtime performance hit: small.

So, these defines can be added without using the -debug flag, which removes the compiler optimisations, which accounts for over 80% of the performance drop.

Built-in Profiler

So where is all the time spent? To answer this question, you can use the built-in profiler. The profiler needs HXCPP_STACK_TRACE, and is started by calling cpp.vm.Profiler.start(filename) from the haxe thread you are interested in. You can call this, say, in response to a button-press, but in this example, I will call it from the mainline. You can provide a log filename, or you can just let it write to stdout. If you use a relative filename in an nme project, the file will be written into the executable directory.

  private static function create()
  {
     cpp.vm.Profiler.start("log.txt");
     Lib.current.addChild (new BunnyMark());
  }

We can then analyse the log. The entries are sorted by total time (including child calls) spent in the routine. The first few are all about 100%, as they look for somewhere to delegate the actual work to. Soon enough, we get to this entry:

Stage::nmeRender 95.60%/0.07%
   DisplayObjectContainer::nmeBroadcast 39.6%
   extern::cffi 60.3%
   (internal) 0.1%


Here the Stage::nmeRender call is almost always active, and is broadcasting an event (the ENTER_FRAME event) for 40% of its time, and calling into cffi (nme c++ render code) for 60% of the time. So we have learnt something already.

You can trace ENTER_FRAME the calls though the event dispatcher until we get to the routine actually in bunnymark:

TileTest::enterFrame 36.55%/8.26%
   Lib::getTimer 0.1%
   Tilesheet::drawTiles 70.2%
   Graphics::clear 6.6%
   DisplayObject::nmeSetY 0.0%
   DisplayObject::nmeSetX 0.0%
   DisplayObject::nmeGetWidth 0.2%
   DisplayObject::nmeGetHeight 0.1%
   DisplayObject::nmeGetGraphics 0.2%
   GC::realloc 0.1%
   (internal) 22.6%

Here the “36.55%/8.26%” means that 35% of the total exe time is spent in this routine, including its children, but only 8% of the total time is spent internally (ie, not in child calls).

And, looking at the drawTiles call:

Tilesheet::drawTiles 25.65%/0.01%
   Graphics::drawTiles 99.9%
   (internal) 0.1%

We see 25% of the total time is spend in the NME Graphics::drawTiles call. So this app spends 60% of the time in drawing routine, and 25% of the time in preparing the draw call. From this, you can assume that it is pretty well optimised!

It is also interesting to note the GC entry:

GC::new 0.17%/0.15%
   GC::collect 12.0%
   (internal) 88.0%


Which is very small, indicating that techniques such as object pooling would have no effect here.

This technique is available on all platforms – you just might have to be a little bit careful about where you write your output file.

Built-in Debugger

The built-in debugger requires you to compile with the HXCPP_DEBUGGER define. Starting the debugger is similar to starting the profiler.

  private static function create()
  {
     new hxcpp.DebugStdio(true);
     Lib.current.addChild (new BunnyMark());
  }

You will note that the “DebugStdio” class is in the hxcpp project, so you will need to add the “-lib hxcpp” command, or via nmml: < haxelib name="hxcpp" />.

The “true” parameter means that the debugger stops as soon as you hit this line. This allows you to set breakpoints etc. Running the above, I get an empty display window (no draw calls have been made yet), and a prompt on the command line:

debug>stopped.
debug>h
help  - print this message
break [file line] - pause execution of one thread [when at certain point]
breakpoints - list breakpoints
delete N - delete breakpoint N
cont  - continue execution
where - print call stack
files - print file list that may be used with breakpoints
vars - print local vars for frame
array limit N - show at most N array elements
mem - print memory usage
collect - run Gc collection
compact - reduce memory usage
exit  - exit programme
bye  - stop debugging, keep running
ok
debug>

Entering “files” shows the input files with indexes 0 to 93. You can use either the filename or file number for setting breakpoints. For example:

debug>break BunnyMark.hx 41

Will set a breakpoint for line 41 on BunnyMark.hx. Currently, you are going to need to have the file handy to look up the line number. So now we want to go back to executing:

debug> c


And immediately, the debugger prints “stopped”. This is because the breakpoint has been hit. To find out where, you can use the “w” command:

debug>stopped.
w
Must break first.
debug>where
*1:FilePos(Method(BunnyMark,addedToStage),BunnyMark.hx,41)
 2:FilePos(Method(Listener,dispatchEvent),neash/events/EventDispatcher.hx,181)
 3:FilePos(Method(EventDispatcher,dispatchEvent),neash/events/EventDispatcher.hx,80)
 4:FilePos(Method(DisplayObject,nmeDispatchEvent),neash/display/DisplayObject.hx,315)
 5:FilePos(Method(DisplayObject,dispatchEvent),neash/display/DisplayObject.hx,198)
 6:FilePos(Method(DisplayObject,nmeOnAdded),neash/display/DisplayObject.hx,458)
 7:FilePos(Method(DisplayObjectContainer,nmeOnAdded),neash/display/DisplayObjectContainer.hx,183)
 8:FilePos(Method(DisplayObject,nmeSetParent),neash/display/DisplayObject.hx,659)
 9:FilePos(Method(DisplayObjectContainer,addChild),neash/display/DisplayObjectContainer.hx,31)
 10:FilePos(Method(BunnyMark,create),BunnyMark.hx,81)
 11:FilePos(Method(BunnyMark,main),BunnyMark.hx,69)
 12:FilePos(Method(Reflect,callMethod),Reflect.hx,55)
 13:FilePos(Method(*,_Function_1_1),ApplicationMain.hx,59)
 14:FilePos(Method(*,_Function_1_1),neash/Lib.hx,75)
 15:FilePos(Method(extern,cffi),/Users/hugh/dev/code.google/hxcpp/src/hx/Lib.cpp,130)
 16:FilePos(Method(Lib,create),neash/Lib.hx,64)
 17:FilePos(Method(Lib,create),nme/Lib.hx,60)
 18:FilePos(Method(ApplicationMain,main),ApplicationMain.hx,39)
ok

The “you must break first” is a little bug in the debugger due to the fact that the break is async. But trying again seems to have fixed this. So here you can see the full call stack. Using the “vars” command shows the local variables, and using the “p” command (short for “print”) shows the values.

debug>vars
[e,this]
ok
debug>p e
nmeIsCancelledNow=false
nmeIsCancelled=false
_type=addedToStage
_target=BunnyMark
_eventPhase=1
_currentTarget=BunnyMark
_cancelable=false
_bubbles=false
type=addedToStage
target=BunnyMark
eventPhase=1
currentTarget=BunnyMark
cancelable=false
bubbles=false
ok
debug>p this
fps=FPS
bg=Background
useHandCursor=false
buttonMode=false
nmeChildren=2 elements
tabChildren=false
numChildren=2
mouseChildren=true
nmeMouseEnabled=true
needsSoftKeyboard=false
moveForSoftKeyboard=false
mouseEnabled=true
doubleClickEnabled=false
nmeScrollRect=(null)
nmeScale9Grid=(null)
nmeParent=neash.display.MovieClip
nmeID=3
nmeGraphicsCache=(null)
nmeFilters=(null)
y=0
x=0
width=580
visible=true
transform=neash.geom.Transform
stage=neash.display.Stage
scrollRect=(null)
scaleY=1
scaleX=1
scale9Grid=(null)
rotation=0
parent=neash.display.MovieClip
opaqueBackground=(null)
nmeHandle=null
name=BunnyMark 3
mouseY=0
mouseX=0
mask=(null)
height=740
graphics=neash.display.Graphics
filters=(empty)
pixelSnapping=NEVER
pedanticBitmapCaching=false
cacheAsBitmap=false
blendMode=NORMAL
alpha=1
nmeTarget=BunnyMark
nmeEventMap=Hash
ok

So now we have a little fun (in a very nerdy sort of way):

debug>set fps.y = 200
ok
debug>cont
running

And you can see that the fps counter has moved down the screen. The more astute reader will notice that the “y” member is actually a “property” and that setting this property has actually caused some haxe code to be run. You can also print the value of a function call to get arbitrary functions to run.
While the code is running you can use “break” to stop it wherever it happens to be.
Using the “exit” command is a quick way out – this can be useful on android when you want to make sure the process is actually dead.

You can jump into a different function on the stack via the "frame" command (notice the "*" has moved), and examine the vars there:

 => frame 17
ok
 => where
 1:FilePos(Method(BunnyMark,addedToStage),BunnyMark.hx,41)
 2:FilePos(Method(Listener,dispatchEvent),neash/events/EventDispatcher.hx,181)
 3:FilePos(Method(EventDispatcher,dispatchEvent),neash/events/EventDispatcher.hx,80)
 4:FilePos(Method(DisplayObject,nmeDispatchEvent),neash/display/DisplayObject.hx,315)
 5:FilePos(Method(DisplayObject,dispatchEvent),neash/display/DisplayObject.hx,198)
 6:FilePos(Method(DisplayObject,nmeOnAdded),neash/display/DisplayObject.hx,458)
 7:FilePos(Method(DisplayObjectContainer,nmeOnAdded),neash/display/DisplayObjectContainer.hx,183)
 8:FilePos(Method(DisplayObject,nmeSetParent),neash/display/DisplayObject.hx,659)
 9:FilePos(Method(DisplayObjectContainer,addChild),neash/display/DisplayObjectContainer.hx,31)
 10:FilePos(Method(BunnyMark,create),BunnyMark.hx,81)
 11:FilePos(Method(BunnyMark,main),BunnyMark.hx,70)
 12:FilePos(Method(Reflect,callMethod),Reflect.hx,55)
 13:FilePos(Method(*,_Function_1_1),ApplicationMain.hx,59)
 14:FilePos(Method(*,_Function_1_1),neash/Lib.hx,75)
 15:FilePos(Method(extern,cffi),/Users/hugh/dev/code.google/hxcpp/src/hx/Lib.cpp,130)
 16:FilePos(Method(Lib,create),neash/Lib.hx,64)
*17:FilePos(Method(Lib,create),nme/Lib.hx,60)
 18:FilePos(Method(ApplicationMain,main),ApplicationMain.hx,39)
ok
 => vars
[icon,title,flags,color,frameRate,height,width,onLoaded]
ok
 => p title
BunnyMark

The command line is all well and good for desktop apps, but it is not much use for mobile apps. To use the debugger on mobile, you can create a debug socket server - the mobile will then connect over WiFi. On your desktop, create and run the hxcpp DdebugTool:

haxe -main hxcpp.DebugTool -lib hxcpp -neko server.n
neko server.n
Waiting for connection on 192.168.0.12:8080

You can see the ip:port that the server is waiting on. Then, back in your code, replace the "DebugStdio" line with a "DebugSocket" line, using the ip:port from the server:

private static function create()
{
   new hxcpp.DebugSocket("192.168.0.12",8080,true);
   Lib.current.addChild (new BunnyMark());
}

And then the operation is exactly the same as before.

The debug code is designed to allow different protocols and backends. It should be possible to replace the code in the hxcpp library with code of your own to present the debug information in any way you like. The "worker" classes are in cpp.vm.Debugger, and you can build your own debugger on top of these.
As a final trick, you can call the debugger functions directly (eg, to always add a breakpoint), or cpp.vm.Debugger.breakBad() (I've been watching too much TV) to allow complex conditions to generate breakpoints, eg:

   if (items.length>0 && !found)
      Debugger.breakBad(); // WTF ?

WWX Conference

I recently got back from ‘WWX’, the World Wide Haxe conference. I had a fantastic time – got to meet a whole bunch of people from the community.

I gave a presentation about the architecture and some details of the hxcpp backend. The slide are in wwx2012-hxcpp.pdf.

Multi-Language-Bench

I noticed that Google have a site that compares a few languages using a graph traversal benchmark. http://code.google.com/p/multi-language-bench/.

So I thought it would be interesting to see how haxe/hxcpp fares. I started with a direct (ie, almost line-for-line) translation of their cpp implementation. I changed the list to arrays where appropriate, and implemented one “set” as an array because haxe does not have a native “dictionary” object for keying from generic objects.

The supplied cpp target was pretty easy to compile on windows by ignoring the makefile and using:
cl -O2 LoopTesterApp.cc mao-loops.cc /EHsc

The haxe target uses (right-click, Save As) LoopTesterApp.hx and MaoLoops.hx, and compiles with:
haxe -main LoopTesterApp -cpp cpp

The java_pro code can be built and run (note that increased stack size is required when running) :

$JAVA_HOME/bin/javac LoopTesterApp.java
$JAVA_HOME/bin/jar -cvf LoopTesterApp.jar `find . -name \*.class`
java -Xss15500k LoopTesterApp

The java target requires additional stack space – and so does neko, however there is no option to increase the stack space with neko like there is in java, so neko just panics. I have not tried as3 – I guess there will be a script timeout which would need to be managed. Also a JS or v8 time would be very interesting.

The runtimes are:

cpp 19.2 seconds
cpp (claimed) 6 seconds ?
hxcpp 26.7 seconds
java (pro) 22.5 seconds

The google paper cites a 3x speedup with optimised c++ code, but there is no code for this.

The java implementation is the hand-optimized version. In hindsight, I should probably have ported this version, rather than the vanilla cpp version. It includes optimizations such as object pooling and task-specific containers. Also, this particular benchmark is designed to allow java to comfortably perform its JIT compiling.

So in conclusion, I would say I’m pretty happy with these results. I’m sure there are some micro-optimizations, such as the “unsafe get” on arrays, which does not check the bounds, and some higher-level stuff that profiling may reveal that could share quite a few percent from the hxcpp time. I’m not particularly interested in optmising for a particular benchmark, however a little bit of profiling here may help speed up the target as a whole, which would be a very good thing.

NME From Scratch

Part 1 – Get The Basics Going

I’ve just got a shiny new computer at home – nothing installed. So it seems like a good chance to go through exactly what it takes to get and NME sample up and running on a new Windows 7 box.

8:20pm For starters, I’ll need a c++ compiler, so first thing is to start the MSVC 2010 Express downloading: 2010-Visual-CPP.

8:25pm OK – I’ve signed my rights away and that is downloading. The next thing I’ll need is haxe. It is easy to install from here.

8:28pm Haxe 2.07, neko 1.81 downloaded and installed. Windows complained that it might not have installed correctly, but this is just because the exe had “installer” in the name, and did not write an “uninstall” entry.

Test: Start a “cmd” prompt by clicking on the Windows start circle and type “cmd[Enter]” into the search box. And in this box, type “haxe [Enter]”. I am now rewarded with the haxe help message.

8:35pm Visual C++ Express in successfully installed.
Test: Start up a new cmd shell, and type “cl“. This does not work because the exe can’t be found in my path. But here is the trick. Type “c:\Program Files (x86)\Microsoft Visual Studio 10.0\Common7\Tools\vsvars32.bat” at the prompt (note:include the quotes!), and get the message “Setting environment for using Microsoft Visual Studio 2010 x86 tools.”. Now “cl” is rewarded with the Microsoft banner.

8:41pm I’m on a bit of a roll here, so I’ll see if I can get an haxe project going. As I said, I have nothing installed, so I’ll go old-school. First thing is to make a directory. The cmd prompt starts in my home directory (c:\Users\Hugh), and I will make a directory:
mkdir projects
cd projects
mkdir hello
cd hello

And now, do the best I can:
notepad.exe Hello.hx (yes I do want to create the file)

class Hello
{
  public static function main()
  {
     trace("Hello!");
  }
}


And switch back to the cmd prompt:
haxe -main Hello -neko hello.n
neko hello.n

Hello.hx:5: Hello!

Woo Hoo! 8:48pm and I’ve run my own program.

Now lets get even more adventurous, and try a c++ example. Trying:
haxe -main Hello -cpp bin
Tells me that “Project hxcpp is not installed” – so let’s install it:
haxelib install hxcpp
And try again:
haxe -main Hello -cpp bin
And test:
bin\Hello.exe
8:43pm, I have my first hxcpp prgram working!

Now, try for some graphics:
haxelib intall nme
and start a new project:
cd ..
mkdir graphics1
cd graphics1
copy “c:\Motion-Twin\haxe\lib\nme\2,0,1\samples\02-Text\Sample.hx”
haxe -main Sample -cpp bin -lib nme
bin\Sample.exe

9:05pm And there it is. Haxe, neko, hxcpp, nme VC2010 installed and run in 40 minutes, including this write up.

Part 2 – Compile NME From Source

Well, that went much better than I expected, so I will now attempt some bleeding-edge stuff. The version on NME used above is old, and I have no one to blame but myself. My intentions are to do a release soon, but I just have not got my finger out. Which leave me with the option of compiling NME from source if I want the latest features.

First thing, is to create a place where I can download various bits of source code for compiling. I’m going to put it a “e:\code.google”, because my C drive is a fast SSD, and has limited room.

e:
mkdir code.google
cd code.google

Following the instructions from the source page, but changing the name, I can get a copy with:
svn checkout http://nekonme.googlecode.com/svn/trunk/ nme
– if only I had svn installed. So first install this, I’ll be using this version. Once installed, I have to restart the cmd prompt and do the vsvars32.bat thing again. Now when I try again, I get the required files. There is also a companion project to go with NME, and that is the “sdl-static” project, which contains libraries required by NME. To get this, simply do:
svn checkout http://sdl-static.googlecode.com/svn/trunk/ sdl-static
This takes a while….

Time to build –
cd nme\project
haxelib run hxcpp Build.xml

The “haxelib” tool looks for a file called “run.n” in an installed haxe library and runs it. In the hxcpp project, the run.n file gathers compiler options to build the haxe output. This same program can be used to build other projects – including the NME project. Unfortunately, compiling NME like this gives the error ” cannot open input file ‘ddraw.lib'”. This is because the VC express install does not have all the required system support files. This file can be found in the “DirectX SDK”, and I’ll be using the June 2010 version. This is a huge file, so it will take a while. If you think it is a lot of effort for a tiny lib, then you are right.

10:10pm and the download has finished. I have chosen to install it in “e:\SDKs\Microsoft DirectX SDK (June 2010)”, because I’m trying not to put crap on my C drive, and I will be installing quite a few SDKs, and it is nice to have them all together.

This does not immediately fix the problem, because the NME project does not know where I installed it. This is where the per-machine hxcpp config comes in.

Following the instructions in BuildCommon.xml, I create a file in “C:\Users\Hugh” called “.hxcpp_config.xml”, and put the following in it:

<xml>
  <section id="exes">
     <linker id="dll" if="windows">
        <flag value = "-libpath:e:\SDKs\Microsoft DirectX SDK (June 2010)\Lib\x86"/>
     </linker>
  </section>
</xml>

Oh crikey! Looks like Microsoft in their wisdom have dropped support for this ddraw.lib, and I’m currently using a version of SDL that needs it! It’s OK, problem solved – I’ve added it to the NME project, but you still need the SDK for dxguid.lib, which I guess I should also add.

Anyhow, after a long delay, at 10:30pm I have NME building!

Now, going back to the original graphics1 example, the first thing to do is tell haxe to use our SVN haxe code instead of the 2.0.1 dowloaded from haxelib. This is done via:
haxelib dev nme e:/code.google/nme

Then build & test:
haxe -main Sample -cpp bin -lib nme
bin\Sample.exe

Which works as before. But now we can test some of the new features in NME. First get the new sample, and the new associated project file:
copy e:\code.google\nme\samples\02-Text\Sample.hx .
copy e:\code.google\nme\samples\02-Text\Sample.nmml .

Then you can use the NME build tool, with the command “test” (which is “build” and “run”) on the Sample.nmml project file, and for the target “neko”.
haxelib run nme test Sample.nmml neko
And you can see the result. Then you can test for cpp:
haxelib run nme test Sample.nmml cpp

So it’s now 10:45pm (had to catch the end of “Dexter”) and I’ve successfully compiled the latest version of NME and tested the new project feature.

Part 3 – Android

Things seem to still be going well, so I’m going to take one more step – android (spoiler – this is going to take longer than expected). First thing to so is install the Java Development Kit. (NOTE: Install the “windows” version, not the “x64” version) Then, the android SDK.
I installed java JRE and JDK in my SDK directory, but Google’s (always painful) build tools seem to think I have not installed java, even though it works from the cmd prompt. Thank guys. So I’ve uninstalled it, and reinstalled the JRE in the default location, and now it seems happy. The Android SDK download is just the start – it now runs and downloads a whole bunch more. This looks like it may take some time…

I may as well get on with downloading the NDK too. And while I wait for those I’ll get my phone ADB USB drivers installed. My HTC phone actually installs the drivers when I install HTCSync, found on my sdcard that was shipped with it.
EDIT: The android ndk r5b still has issues with exceptions/c++. However, these can be solved by dropping this version of libstdc++.a from the Crystax r4 distribution over the top of sources/cxx-stl/gnu-libstdc++/libs/armeabi/libstdc++.a in your downloaded ndk. If google ever manage to write a good build system, they might end up being a successful company.

The Google build tools also require the “Cygwin” utilities, so install these too.

Finally, we will need a new version of hxcpp, which we can get with:
e:
svn checkout http://hxcpp.googlecode.com/svn/trunk/ hxcpp
haxelib dev hxcpp e:\code.google\hxcpp

11:45pm, I have finally downloaded and installed the Android prerequisites (I think) but will give up now.

Next day – Here we go again. Now to use the google android NDK, you need to have the cygwin dlls in your exe path. To change the path, right click in the “Computer” shortcut in the start menu, and choose “properties”, then on the left “Advance system settings”, then the “Environment Variables” button and scroll through the top bit for “PATH” and click “edit”. This already has haxe and neko in it, so we add the cygwin:
%HAXEPATH%;%NEKO_INSTPATH%;e:\SDKs\cygwin\bin
Now restart the cmd prompt, and typing “ls” should work.
And one more thing – in lieu of using “eclipse” for java building (which I just can’t stand – don’t get me started), the google tools need the “ant” program, which you install by unzipping somewhere.

Tell the build system where we installed these things.

set ANT_HOME=e:/SDKs/ant
set ANDROID_SDK=e:\SDKs\android-sdk
set ANDROID_NDK_ROOT=e:\SDKs\android-ndk
set JAVA_HOME=e:\SDKs\Java\jdk1.6.0_24

And rebuild nme, like before, except that the “obj” directory should be removed first, because I have not yet allowed 2 compilers to be running at the same time.
haxelib run hxcpp Build.xml -Dandroid

Now, back in the original directory, we can build + run for android:
haxelib run nme test Sample.nmml android

Which, finally, works! You can terminate the debug log with control-c.

So, an awful lot of set up, but subsequent projects should only be a single line.

NME Font Rendering

I notice FreeType has a new version out, which has some reasonable changes since a key patent has expired.

Version 2.3.9, Default
Version 2.3.9, AutoHinting
Version 2.4.4, Default
Version 2.4.4, AutoHinting
Flash (Mac)
GDI Threshold (Current)
GDI AA
GDI AA + Gamma
Flash (Windows)

So a few observations: The “Default Hinting” has changed quite a bit for TrueType fonts in the latest version. I think this code is what the expired patent related to, allowing the font-specific hinting data to be used. The “AutoHinting” mode is based on font-independent logic built into FreeType. The Flash renderer uses component based sub-pixel rendering, using RGB components to get finer details. The font also looks a bit “fatter”.

Currently NME uses a single set of bitmaps for the fonts, which must be used for all colours. This means that component based sub-pixel rendering is not really an option. However, it may be possible to sort something out (at the expense of more memory) if the need really arises. But also note, this is counter-productive in landscape mode on mobile devices.

On windows, NME currently uses GDI fonts with a threshold. I like the look of this (I spend most of my time on windows) for the small fonts, but it looks pretty bad on the larger fonts. Particularly note the exactly 1-pixel wide vertical lines in the “H” and the “l”, which I like. The larger fonts look much better with anti-aliasing on. However, windows applies some kind of gamma-correction when rendering fonts, and you get quite a different look for black-on-white and white-on-black. To work around this, I have applied a lookup-table to get a bitmap that will work for both light and dark.

Finally notice the windows flash renderer does not use AA with this swf (although the Mac version did).

In the next version, I will change windows over to use GDI + AA + Gamma. It is possible to use FreeType, but I think the font is slightly less readable at the smaller sizes. What do you think?

Four Years – Still Kicking

Wow, I missed the 4-year anniversary. I have been a bit remiss in updating the old social-media postings of late, but will try harder. So apologies to those whose comments I have not answered, and I hope to do better in the future.

I would also like say a big thanks to those who have donated to the site – it is nice to feel useful.

The main change since last update was the release of hxcpp 2.07. This goes with the latest haxe release and fixes many bugs, making the platform more robust.

Work on NME continues. There has been some increased interest of late, and a new release is well overdue. I’m currently working on a “project” system to help with getting up-and-running on the various platforms. This will replace the iPhone template system and extend it to all supported platforms.

You can always checkout the svn version of NME, but you will need to build the binaries yourself. Although I have quite a few outstanding issues, I think I will do a release once I get the project system up-and-running.

Android + HXCPP – a Quickstart Guide

After having some success with making an Xcode template, I thought it would be relatively easy make something similar for eclipse and Android. However, there was nothing but pain for me when I tried, so instead I’ve decided to write this guide.

Prerequisites

There are quite a few prerequisites you need to organize before you can get things going. Android allows building from Windows, Mac and Linux. The procedures are quite similar, except that Windows requires some messing about with Cygwin binaries. The method described here avoids most of the Cygwin pain \- and the google make sytem pain \- by avoiding the google make sysem altogether.

  • Download and install the Android SDK. This is the Java tools and libraries required for building and debugging byte-code applications.
  • Download and install eclipse IDE. This is the IDE that runs the SDK – follow the instructions on the Android SDK page and install the Android plugins too.
  • Install the USB drivers for your device (if required). For my device (HTC Legend) I found the drivers on the phone itself by using it as a thumb drive.

You should now be in a position to build some sample (byte-code) applications for your device.

  • Download the Android Native Development Kit. This allows you to build binary code for your device. Now for HXCPP, it is very important to download the latest build provided at Crystax.net, which is a build done by a generous community member that corrects some of the glaring omissions of the official build, namely RTTI and exceptions. If it is all the same to you, extract it to c:/tools/android-ndk for Windows, and ~/tools/android-ndk for other systems, and this will make the remaining instructions easier.
  • Currenly on Windows, you need the svn version of HXCPP (slightly newer that 2.06.1) which has some include path fixes. See the instructions at http://code.google.com/p/hxcpp/ for getting the latest version.
  • Also on windows, you need the Cygwin dlls in your path. One way to do this is to install the whole Cygwin toolchain and put it in your path. The other way so to drop the two dlls from cygwin-extra.tgz into the ndk binary directory, ie c:/tools/android-ndk/build/prebuilt/windows/arm-eabi-4.4.0/bin.

Project structure

An android project consists several components that all work together.

  • Java Code. The Java code provided in the sample project comes from a couple of places. Because the project is graphics based, the copy NME Java code is included. If the version of NME increases, it may be desirable to update the NME code, either by copying the new code in, or instead linking to the NME code directly. Also, the HXCPP bootstrap Java code is included along with a small Activity wrapper file.
  • Native code. The shared object files provide native code for running on the device. These include the standard libraries, the NME library and the haxe code compiled with hxcpp.
  • AndroidManifest.xml. This controls how your application is deployed, and quite a few things can be done with this file. It is best to consult the Android documentation about what can be done here.
  • Resources & Assets. These can be useful if you want to add standard menus or other GUI elements to your application.

The basic workflow starts by making a change to your haxe source files. You then compile the haxe code to Android cpp, which is in turn is compiled to an android shared object. This .so file is then copied to the libs/armeabi directory in the project. Because eclipse does not recognize a change to the shared objects as a important update, it is then necessary to touch one of the Java files so that eclipse rebuilds the project. These steps are handled by the build_haxe batch/shell scripts provided with the project, so all you should have to do is change the code and run the script. Then, press the “play” button in eclipse(the first time you do this, you may need to specify Run-As Android Project) and your application should launch.

The haxe code included in the sample directory uses a fixed class name, AndroidMain, as the bootstrap point for building the haxe shared object, libAndroidMain.so. By fixing these names, the build script is simplified. I encourage you to put your main code for the application outside the provided project directory, and edit the AndroidMain.hx and build.hxml files to point to this external application code. This will help with cross-platform development, and keep the boiler-plate code separate from your precious source code.

Creating a New Project

I could not find a very nice way to make a project template, so this is what I’ve come up with. First, download and extract the example project, android-2.06.1.tgz. You may like to rename the parent directory from android-2.06 to something more meaningful at this stage.

At this point, you should be able to build the sample haxe code using the build-scripts provided. This requires your prerequisite installations to be good, so it is worth testing. If you have downloaded the android-ndk to a different location, you can edit the appropriate build script to reflect this. You will need the latest NME code from haxelib. Windows users may also need the svn version of HXCPP.

So that all worked? Congratulations, your system is set up for development.

Next, fire up eclipse, and create a “File – New Project..”, then select “Android Project”, then select “Create project from existing source”, and browse to your newly created directory. You will notice that down the bottom of the Dialog, the properties are filled out with names from the sample project – we will change these next. Once you select “Finish”, your project should be created, and ready to run on your device.

The project and package names are tied into Java and Android naming conventions, as well as the Android manifest, and can be difficult to budge. It is easiest to use the eclipse Refactor-Rename menu option to change the name from “MyActivity” to something more appropriate for you, say “CircleDisplay”. Then in the source tree under “src”, there is a file in com.company called “MyActivity.Java”. Select this, and use the menu option to change its name to “CircleDisplay” too. Similarly, select the “com.company” and change this to something else, in my case “com.gamehaxe” (select preview and agree to everything). There is one final change required – the refactor option misses a reference in the AndroidManifest.xml because it starts with a period. Double click this and in the “AndroidManifest.xml” tab, change the “.MyActivity” to “.CircleDisplay”.

It is important to rename these items because it effects how your application is ultimately stored in the device.

So now you should be good to go – press the play button and select “Android Project”.

There are quite a few things that can go wrong with so many things to install, so I’ve got my fingers crossed for you.

Minor Updates

I have just released a few minor updates to nme + hxcpp, which you can find on haxelib. These are relatively small \- just pushing out a few fixes for some bugs that have been reported. In most cases the bug reports we accompanied by a fix \- you’ve gotta love open source. The iPhone/Xcode template has also been updated, you may need to follow the instructions in the post below.

There is one significant change though – the “nekoapi.dll” file that is used for compatibility between hxcpp binaries (ie, NME) and neko has changed its extension to “ndll” so that neko can communicate directly with it. This allows the String instances created externally to be “blessed” as haxe strings without having to call nekoToHaxe on them, and therefore methods such as substr will work.

The other change of note is that I removed the libfreetype code from the iPhone target, and used native font rendering instead. Let me know if this breaks anything. One side effect is that the default font will now be system dependent, with the iPhone getting its usual font. I will also have to have a good look at the font render quality – freetype may have a little bit better sub-pixel sharpness.

There was a bug in the 2.06 haxe distribution when writing files. I have fixed this by putting an override in hxcpp, which you can access with the command line options: “-lib hxcpp”. I have also folded this change into haxe svn, so you will not need to do this in 2.07.